One of the big strengths of P6 is its ability to group any number of schedules into a Master Schedule simply by putting the schedules into an EPS. Opening EPS will open all of the otherwise independent schedules, even if they have mismatched structures. You can combine schedules that came from other P6 installations, MS Project, SureTrak, P3 and Contractor and consider them all as a single schedule.
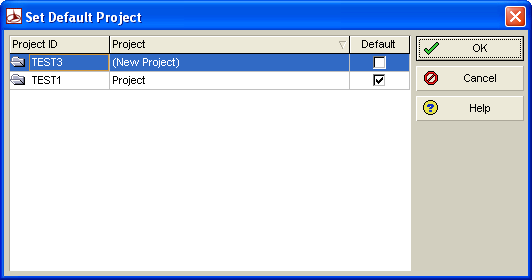
In P6 each project can have its own scheduling options. If multiple project schedules are open and the schedule is calculated, P6 applies the Default Project’s Scheduling Options. Similarly if multiple projects are open and you add new information to the database, P6 will use the default project’s settings. When you open multiple projects, users should ensure that they specify the correct default project using “Set Default Project” dialog box shown below. P6 also uses this project’s leveling settings for calculating the schedule (manually or via the Job Services feature) and it becomes the default destination for new items such as activities or issues unless the layout is grouped by WBS and a different project is selected before adding new items.

Set Default Project Dialog Box
Another issue with working with multiple schedules arises if these schedules have different data dates. Each project will be scheduled based on its own Data Date. The earliest data date of all open projects will be shown as the data date on the Gantt chart. The data dates for individual projects can be changed when applying actual dates but not when scheduling.
New to P6, Service Pack 2 (P6.2) is the option to calculate the total float based on the finish date of each project in a collection of schedules or on all opened schedules. Previously, when a project containing multiple schedules was opened, P6 calculated the dates based upon the early finish of the last activity in each schedule. This meant each schedule calculated the critical path independently, even if they were tied together in a network of relationships. The older method fails to identify the single critical path for a project of multiple schedules. The down-side of the new option is, other than viewing the scheduling log, there is no indication as to which option was used when later reviewing the results of a CPM computation. On the other hand the Longest Path still only works on one schedule at a time – you cannot produce a multi-schedule longest path.
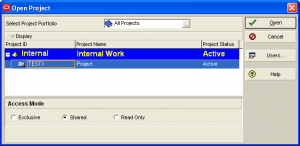
P6 provides 3 different types of access modes when opening a project, Exclusive, Shared and Read Only shown below. If the project is opened in shared mode, then multiple users can modify or update the schedule simultaneously. This results in confusion and it is strongly recommended schedules are opened in Non-Shared access modes. If the schedule is opened in Shared mode then F5 key must be pressed regularly to refresh the schedule otherwise one person can overwrite another’s changes.

Project Access Mode
If external relationships are used between projects and if these projects are replaced by importing a new update or a new version of the schedule then the relationships are not automatically recreated.
Another issue with the external relationships is the relationships are lost if only a single project is exported. In cases like these where the external relationships are lost, P6 attempts to maintain the proper timing by internally constraining the appropriate early/late dates of the activities missing their inter-project relationships. This causes the schedule to mimic the effects of the relationship at the time of the export. The imposed constraints will not show up under the task’s constraint boxes, as these are internally imposed. The only indication of an imposed constraint will be an asterisk printed to the right of the date in the Start or Finish column. These constraint dates will only be visible in the External Dates columns, if displayed. To force P6 to ignore such external constraints, the scheduling options tab has a setting for -”Ignore relationships to and from other projects”. This can also fix extreme negative float values. You can also remove the external constraints entirely from your schedule by showing the External Early Start and External Late Finish columns; remove the external dates shown, and then recalculate the schedule.


